 Save
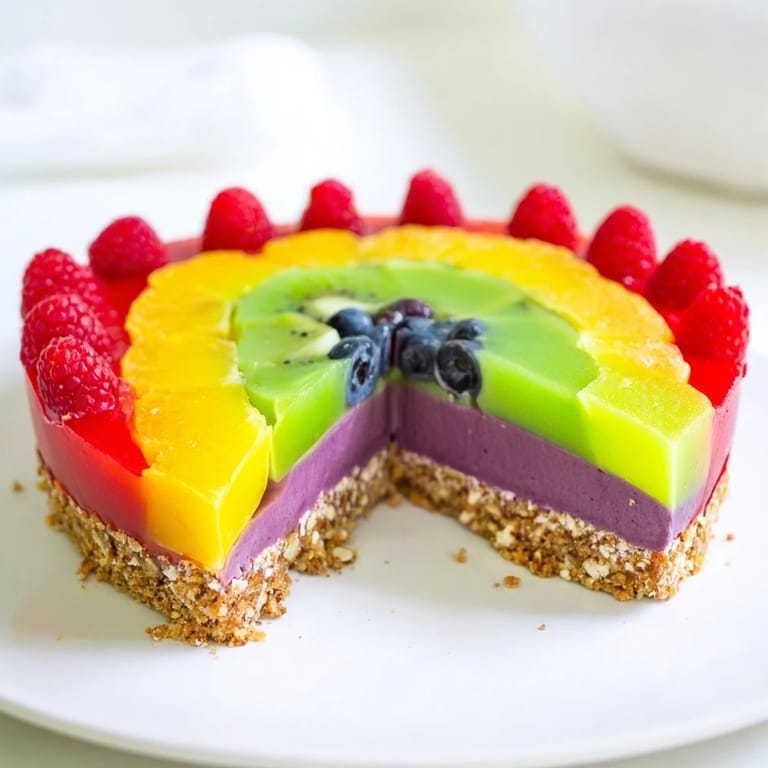
Save I stumbled onto the idea for The Kaleidoscope at a dinner party when someone set down a slice of layered dessert next to a prism sitting on the table. The light caught both at the same angle, and suddenly I was imagining a dessert that actually looked like one—vibrant, geometric, completely unexpected. What started as a late-night sketch became this elaborate panna cotta creation that somehow manages to be both incredibly impressive and oddly meditative to make.
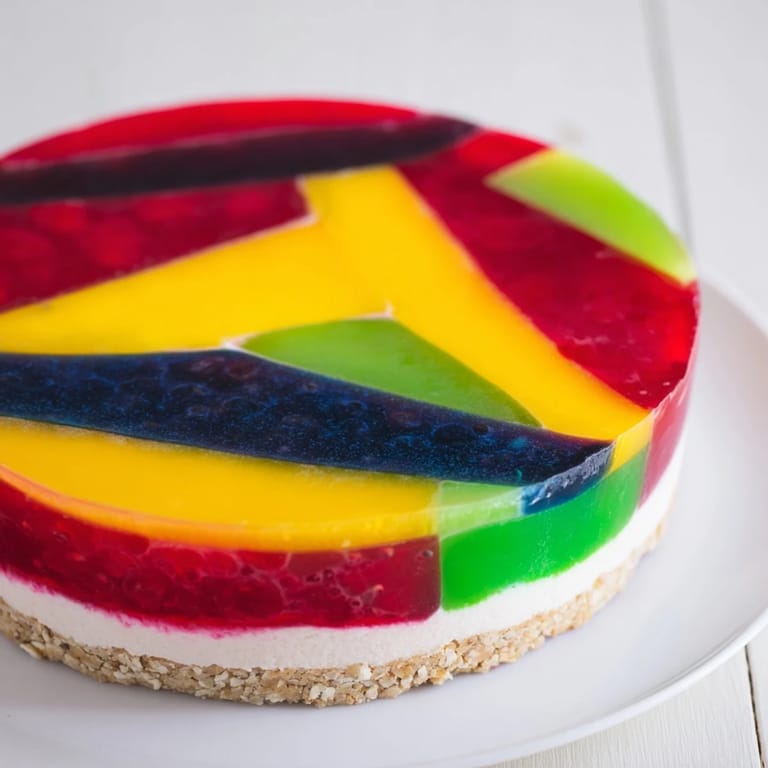
The first time I assembled this for a birthday brunch, I was convinced the dividers would collapse and ruin everything. They didn't, and watching my friend's face when they saw the V-shaped rainbow on their plate made every nervous minute worth it. That's when I realized this dessert isn't just about looking beautiful—it's about creating a moment.
Ingredients
- Whole milk: 200 ml—this is your creamy base; don't skip it for something lighter or the gelatin won't set properly.
- Heavy cream: 200 ml—the richness that makes each bite feel indulgent and silky.
- Granulated sugar: 100 g—keep it granulated for even dissolving, not superfine.
- Powdered gelatin: 3 tsp (or 6 gelatin sheets)—blooming it first is non-negotiable; it prevents lumps.
- Vanilla extract: 1 tsp—adds a subtle warmth that ties the fruit flavors together.
- Food coloring: Gel or liquid in red, yellow, green, blue, purple—gel colors are more vibrant and don't thin out the mixture.
- Fruit puree: 5 tbsp total (raspberry, mango, kiwi, blueberry, blackberry)—use fresh if possible; frozen works but strain out excess liquid.
- Digestive biscuits or graham crackers: 150 g—the foundation that keeps everything grounded.
- Unsalted butter: 60 g melted—allows the crumbs to bind without overpowering the dessert.
Tired of Takeout? 🥡
Get 10 meals you can make faster than delivery arrives. Seriously.
One email. No spam. Unsubscribe anytime.
Instructions
- Build your foundation:
- Crush the biscuits into fine, even crumbs—not dust, but nothing chunky either. Mix them thoroughly with the melted butter until it resembles damp sand, then press firmly into your springform pan lined with parchment. Chill while you work on the next steps.
- Wake up the gelatin:
- Sprinkle it over 3 tablespoons of cold water and let it sit untouched for 5 minutes until it looks spongy. If you're using sheets, soak them in cold water, then gently squeeze out the excess before adding to the warm mixture.
- Create the smooth custard base:
- Heat the milk, cream, and sugar in a saucepan over medium heat, stirring occasionally until the sugar dissolves and the mixture is hot but not boiling—you'll see wisps of steam. Remove from heat, add your bloomed gelatin, and stir constantly for about a minute until it's completely dissolved with no visible specks.
- Add the flavor and color:
- Stir in the vanilla extract, then divide the mixture evenly into 5 bowls. To each bowl, add one fruit puree and a drop or two of matching food coloring, stirring gently until the color is even and the fruity scent rises up.
- Build the rainbow geometry:
- Create 5 V-shaped dividers using aluminum foil or cardboard strips arranged like pie slices in your springform pan. Carefully pour each colored mixture into its designated section, then refrigerate for 30 minutes until the mixtures are firm enough that they won't run into each other.
- Release the dividers:
- Once the 30 minutes is up, gently remove the dividers by carefully lifting them straight up and out. You'll see the V-shaped segments hold their shape perfectly.
- Finish and chill:
- Run a thin knife around the edge of the pan and release the springform. Refrigerate for at least 2 more hours—this resting time helps the layers fully set and makes slicing cleaner.
 Save
Save What I love most about serving this dessert is the quiet before the knife goes in—that moment when everyone leans forward, anticipating what colors they'll see. It transforms a simple panna cotta into theater, and somehow that makes it taste even better.
Choosing Your Fruit Purees
The beauty of this dessert is that you're not locked into any specific fruits. I started with the classic red-yellow-green-blue-purple combination because the colors matched perfectly, but I've made versions with passion fruit, strawberry, and dragon fruit. The key is balancing tartness with sweetness—a puree that's too sour will need more sugar stirred into its section, which can throw off the set time. Taste as you go and adjust the sweetness if needed.
The V-Shape Secret
Creating those perfect V-shaped segments is easier than it looks once you understand the geometry. Think of your springform pan as a clock face and divide it into 5 equal pie slices, with the point meeting in the center. I use strips of aluminum foil because they're easy to bend and they don't absorb liquid, but parchment works in a pinch. The dividers only stay in for 30 minutes, just long enough for the mixture to firm up so it won't migrate into the next section.
Customization and Serving
This dessert is endlessly adaptable once you understand the core technique. You can make it with all the same color for a monochromatic look, use edible flowers frozen into the layers, or even add a thin layer of dark chocolate between sections for contrast. Serve it with fresh berries, a dollop of whipped cream, or even a light citrus curd to add another flavor dimension.
- For a vegan version, swap gelatin for agar-agar powder and use coconut milk and cream instead.
- Make it ahead—this actually tastes better the next day once all the flavors have melded.
- Slice with a hot, wet knife to get clean edges and keep your presentation pristine.
 Save
Save Every time someone cuts into this dessert, there's a moment of genuine delight that makes the effort completely worth it. It's proof that a little geometry and color can transform something simple into something unforgettable.
Recipe FAQ Section
- → How do I create the distinct V-shaped layers?
Use aluminum foil or cardboard dividers to partition the pan into 5 V-shaped sections, then pour each colored mixture separately before chilling.
- → Can gelatin be substituted for a vegetarian option?
Yes, agar-agar works as a vegan alternative to gelatin, and coconut milk and cream can replace dairy for a plant-based version.
- → What fruits are best for the purees in this dessert?
Raspberry, mango, kiwi, blueberry, and blackberry are ideal choices to match the vibrant colors and provide balanced fruity flavors.
- → How long should the dessert be chilled before serving?
Chill the assembled layers for 30 minutes before removing dividers, then chill the finished dessert for at least 2 more hours for optimal setting.
- → What kind of base is recommended for contrast and texture?
A base made from crushed digestive biscuits or graham crackers mixed with melted butter adds a crisp texture that complements the creamy layers.