 Save
Save My neighbor brought over a tin of these last winter, and I was immediately hooked by how the buttery cookie gave way to that tart-sweet guava center. The contrast caught me completely off guard—I'd been expecting something more predictable, but instead found myself reaching for a third one before she'd even finished explaining her recipe. What started as casual cookie theft became an afternoon of me watching her make a fresh batch, asking endless questions about timing and jam selection. Now they're my go-to when I need something that feels special but doesn't demand hours in the kitchen.
I made these for my daughter's school bake sale and watched them disappear within the first twenty minutes. A parent came back to ask for the recipe, saying her kids had never tasted guava before and were now convinced they'd been missing out their whole lives. That moment of seeing something so simple spark actual curiosity in people stuck with me.
Ingredients
- All-purpose flour (2 cups): The backbone of these cookies, giving them structure without being heavy or dense.
- Unsalted butter (1/2 cup, softened): Soft butter creams easier and creates a more tender crumb than cold butter, so plan ahead or gently soften it on the counter.
- Granulated sugar (1/2 cup): Whisked with butter, this creates the light texture that makes these cookies almost melt in your mouth.
- Large egg (1): Binds everything together while keeping the dough workable and the finished cookie soft.
- Vanilla extract (1 teaspoon): Brings warmth and depth that doesn't overpower the guava's personality.
- Salt (1/4 teaspoon): A small amount anchors the sweetness and makes the guava pop more than you'd expect.
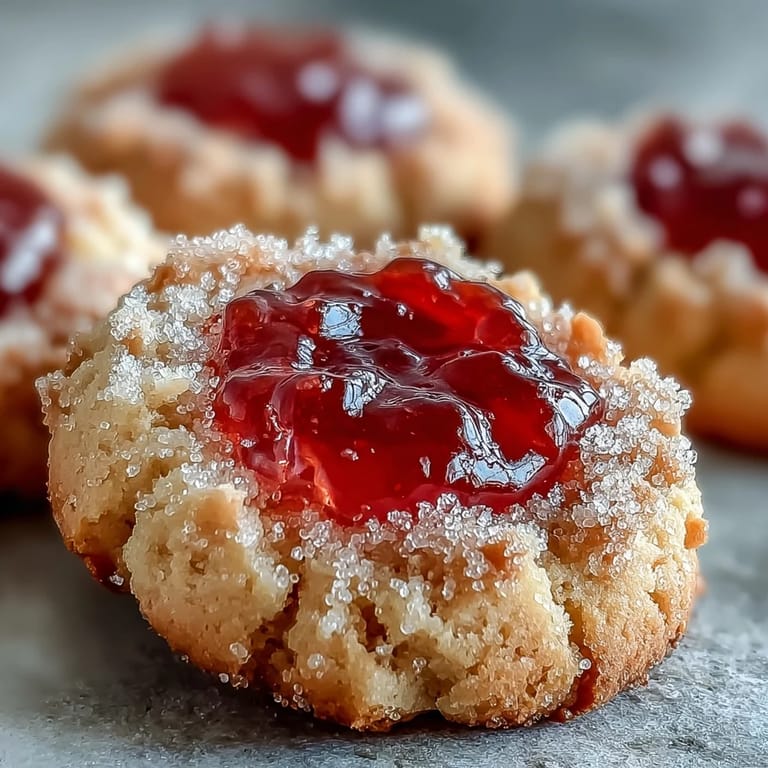
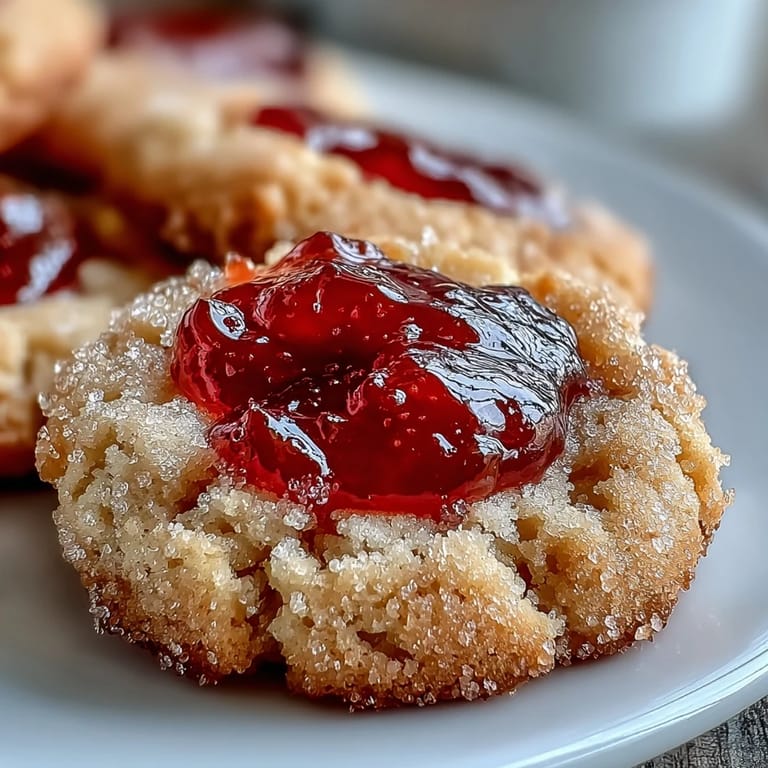
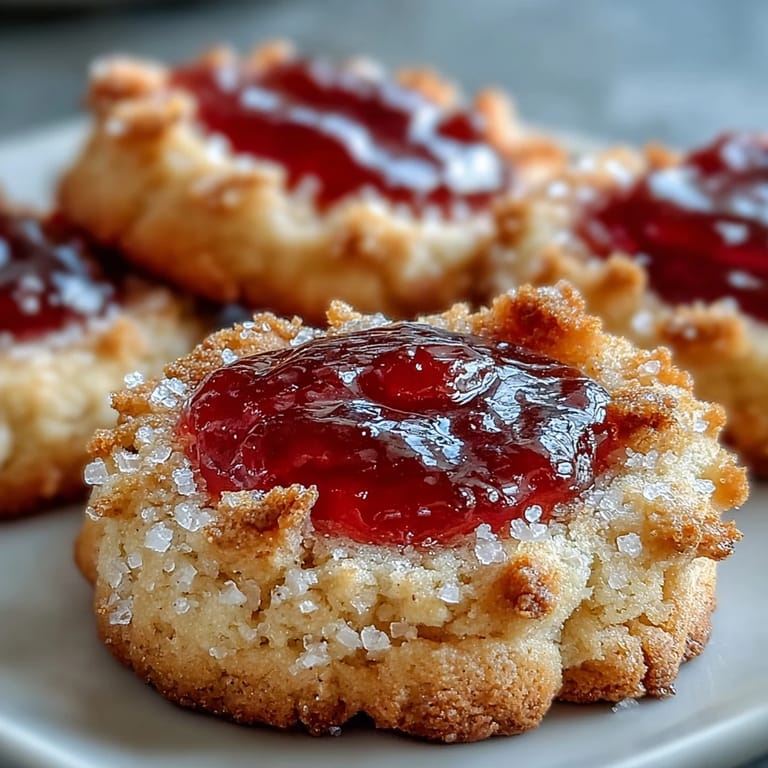
- Guava jam (1/2 cup): The star of the show—choose one that's slightly thicker and less runny, or it'll spread during baking instead of staying in that perfect pocket.
Tired of Takeout? 🥡
Get 10 meals you can make faster than delivery arrives. Seriously.
One email. No spam. Unsubscribe anytime.
Instructions
- Get your workspace ready:
- Preheat your oven to 350°F and line two baking sheets with parchment paper so you're not scrambling once the dough is ready. Having everything in place means you can work at a natural pace without rushing.
- Combine the dry ingredients:
- In a medium bowl, whisk together the flour and salt until they're evenly distributed. Set this aside while you move to the next step.
- Cream butter and sugar:
- In a large bowl, beat softened butter and sugar together for about two to three minutes until the mixture looks pale and fluffy, almost like whipped clouds. This aeration is what gives the cookies their tender texture, so don't skip it even though it takes a minute.
- Bring the wet ingredients together:
- Add the egg and vanilla extract to your creamed butter and sugar, beating until everything looks smooth and well incorporated. The mixture should feel almost silky at this point.
- Unite wet and dry:
- Gradually add your flour mixture to the wet ingredients, stirring gently until a soft dough forms. Don't overmix once the flour appears, or your cookies will toughen up.
- Shape your cookies:
- Scoop out tablespoon-sized portions of dough and roll them between your palms into smooth balls, then place them about two inches apart on your prepared baking sheets. Your hands might get a little sticky, but that's part of the process.
- Create the pockets:
- Using your thumb or the rounded back of a teaspoon, press a gentle indentation into the center of each dough ball. Press deep enough to hold jam but not so deep that you're touching the baking sheet below.
- Fill with guava:
- Drop about half a teaspoon of guava jam into each indentation, letting it settle naturally without overstuffing. Less is actually more here—too much jam will bubble out and caramelize on the baking sheet.
- Bake until golden:
- Slide the sheets into your oven for thirteen to fifteen minutes, watching for the edges to turn just barely golden while the centers stay pale. The cookies will continue to cook slightly on the warm pan after you remove them from the oven.
- Cool with patience:
- Let the cookies sit on the baking sheet for five minutes so they firm up enough to move without breaking, then transfer them to a wire rack to cool all the way through. This resting period is when everything sets properly.
 Save
Save My son surprised me by requesting these for his lunch box all week, which meant I was suddenly baking every other day. That small moment of realizing my kitchen creation had become someone's comfort food in the best possible way made me understand why people love sharing homemade things.
Why the Guava Matters
Guava jam is one of those ingredients that shifts the whole personality of a cookie without making anything more complicated. Unlike raspberry or strawberry, guava has this subtle floral quality that whispers instead of shouts, letting the buttery cookie shine while adding something unexpected. I've tried substituting it with apricot or mango, and while those work, guava just feels right—it's tart enough to cut through richness but sweet enough to feel like an actual treat.
Storage and Keeping
These cookies stay fresh and soft in an airtight container at room temperature for up to five days, though honestly they rarely last that long in my house. If you're making them ahead for an event, bake them the day before and store them sealed so they don't dry out. The jam actually helps keep them moist, which is one of the many small gifts this recipe keeps on giving.
Ways to Make Them Your Own
Once you nail the basic formula, these cookies become a canvas for your own ideas and preferences. I've added a tiny pinch of cardamom to the dough, experimented with different jams, and even brushed a light egg wash before baking for extra shine. The beauty of a simple recipe is that small changes feel intentional rather than necessary, letting you play without ruining anything.
- Sprinkle a tiny pinch of shredded coconut over the jam before baking for a tropical note that catches people off guard.
- If your jam is too runny, warm it gently and whisk in a teaspoon of cornstarch to thicken it before filling.
- These cookies freeze beautifully for up to three months, so bake a double batch when you're already in the kitchen and thank yourself later.
 Save
Save These thumbprint cookies have become my quiet favorite, the recipe I reach for when I want to give someone something that feels thoughtful without being fussy. They remind me that the best moments in the kitchen often come from simple things done with intention.
Recipe FAQ Section
- → What makes guava jam special in thumbprint cookies?
Guava jam brings a unique tropical sweetness with natural tartness that creates a beautiful contrast with the buttery cookie base. Its vibrant pink color also adds visual appeal, making these cookies stand out on any dessert platter.
- → How do I prevent the jam from overflowing during baking?
The key is filling each indentation with only about 1/2 teaspoon of jam—don't overfill. The jam will bubble slightly as it bakes but should stay contained within the thumbprint well. Using a thicker, fruit-based jam rather than a runny jelly also helps prevent overflow.
- → Can I make the dough ahead of time?
Absolutely! You can prepare the dough, wrap it tightly in plastic, and refrigerate for up to 2 days before baking. Alternatively, scoop the dough balls, freeze them on a baking sheet, then transfer to a freezer bag for longer storage. Bake frozen dough balls with an extra 1-2 minutes as needed.
- → Why did my cookies spread too much in the oven?
Excess spreading typically occurs when the butter is too soft or the dough is warm. Chill the scooped dough balls for 15-20 minutes before baking if your kitchen is warm. Also ensure your baking sheets are completely cool between batches.
- → What other fruit fillings work well in these cookies?
Apricot, raspberry, strawberry, and blackberry jams all make excellent substitutes. Each brings its own flavor profile—apricot offers mellow sweetness, while raspberry provides bright tartness. Choose whatever you enjoy or have on hand in your pantry.
- → How should I store these guava thumbprint cookies?
Keep them in an airtight container at room temperature for up to 5 days. Place parchment paper between layers to prevent sticking. The cookies actually develop deeper flavor on day two as the jam melds slightly with the buttery dough.