 Save
Save I stumbled onto these baked oatmeal cups during one of those mornings when my alarm didn't go off and I had fifteen minutes to get out the door. Instead of reaching for the drive-thru, I remembered seeing someone's TikTok video—those perfect golden-topped cups stacked in a glass container—and thought, why not try making them? Turns out, that rushed morning led to something I now make every Sunday. They've become my answer to the constant question of what to eat when life gets chaotic.
My neighbor knocked on my door on a Thursday with her two kids asking if I had anything quick they could grab before soccer practice. I sent them home with three of these cups and a bottle of almond milk, and her daughter asked for the recipe that night. Now we're both making double batches so we can swap flavors—she does blueberry and almond, I do chocolate chip and walnut. It's become our thing, our little kitchen exchange.
Ingredients
- Old-fashioned rolled oats (2 cups): The texture matters here—steel-cut oats will stay too firm, but old-fashioned ones soften into that perfect chewy bite while still holding their shape in the cup.
- Light brown sugar (1/2 cup, packed): This is your sweetness base; packed brown sugar gives you moisture and a deeper flavor than white sugar ever could.
- Baking powder (1 tsp): Just enough to give the cups a subtle rise and keep them from being dense brick-like discs.
- Ground cinnamon (1/2 tsp): The spice that makes your kitchen smell like something magical is happening.
- Salt (1/4 tsp): Never skip this—it wakes up all the other flavors and keeps things from tasting one-note.
- Large eggs (2): They're your binder and add structure so everything stays intact instead of falling apart.
- Milk (1 1/4 cups): Dairy or plant-based both work beautifully; the milk softens the oats and keeps the texture tender.
- Unsweetened applesauce (1/4 cup): This is the secret I learned by accident—it adds moisture and subtle sweetness without needing extra sugar, and it keeps them from drying out during storage.
- Melted coconut oil or butter (1/4 cup): The fat is what creates that rich, almost cake-like crumb; coconut oil gives them a subtle flavor, butter makes them more familiar.
- Pure vanilla extract (1 tsp): Buy the real stuff here—it makes the whole difference between tasting homemade and tasting decent.
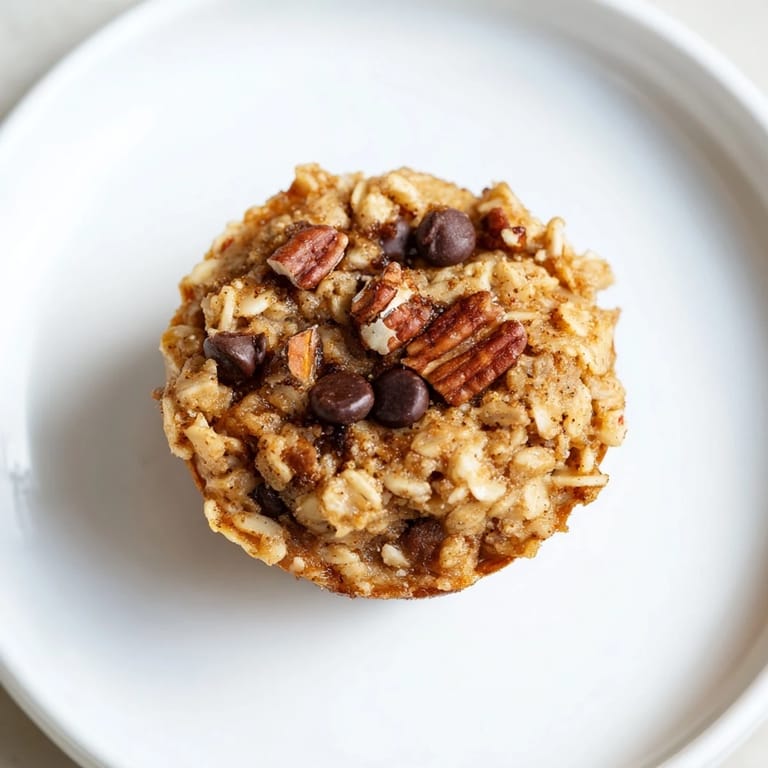
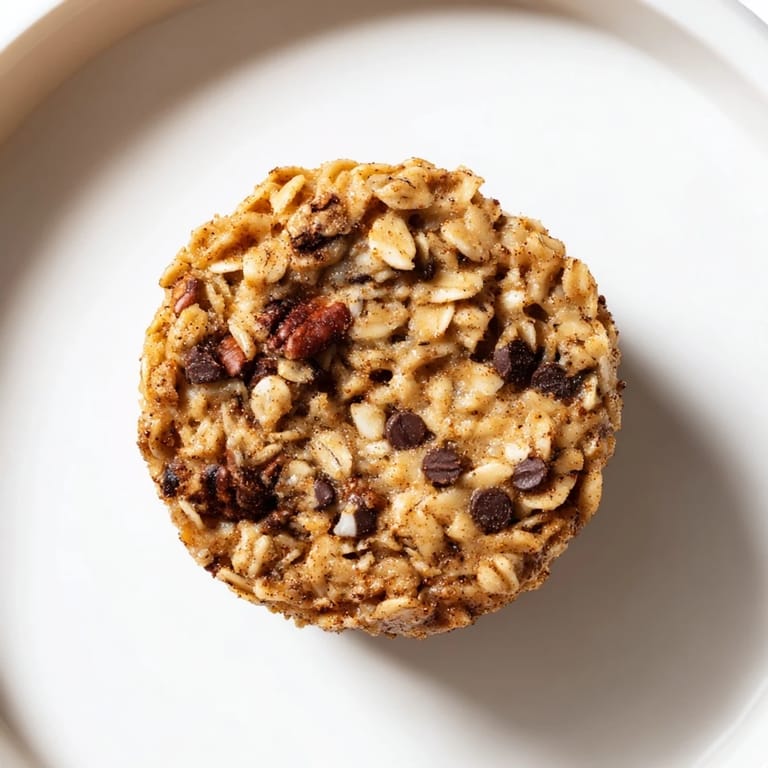
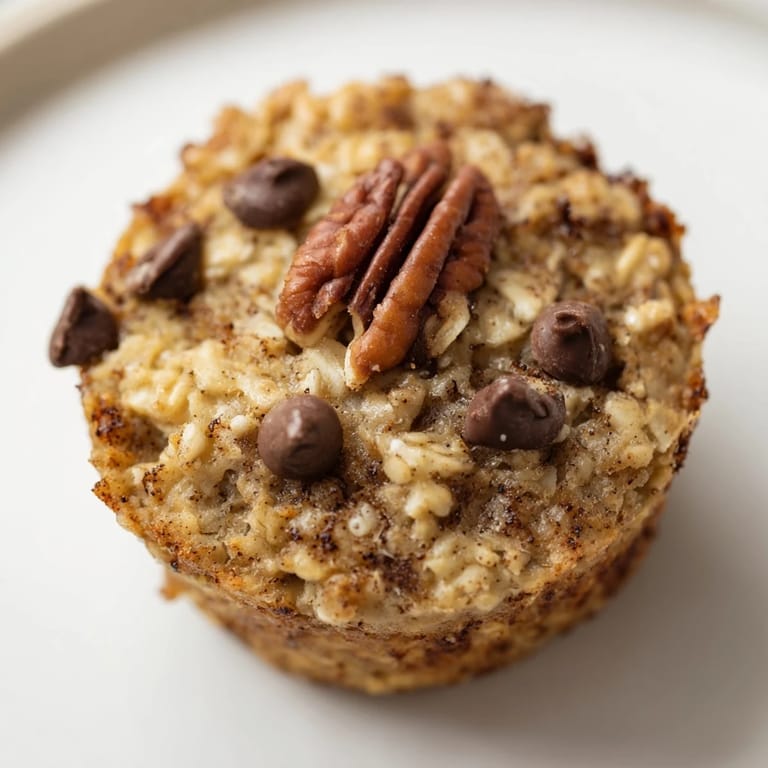
- Mix-ins (up to 1 cup total): Fresh berries, frozen berries, chocolate chips, nuts, dried fruit—whatever sounds good to you becomes the personality of your batch.
Tired of Takeout? 🥡
Get 10 meals you can make faster than delivery arrives. Seriously.
One email. No spam. Unsubscribe anytime.
Instructions
- Get your oven ready:
- Preheat to 350°F and line your muffin tin with paper liners—they peel away so cleanly when these are cooled, and cleanup becomes nothing. If you like the rustic look, nonstick spray works too, though the paper liners really are worth it.
- Mix the dry team:
- In a large bowl, whisk together your oats, brown sugar, baking powder, cinnamon, and salt until everything is evenly distributed. You want no lumps of brown sugar hiding in there because they'll stay gritty in the final cup.
- Combine the wet team:
- In a separate bowl, whisk the eggs, milk, applesauce, melted oil or butter, and vanilla until it's smooth and homogeneous. This step takes maybe thirty seconds but makes sure everything binds together later.
- Bring them together:
- Pour the wet mixture into the dry mixture and stir until you don't see any dry oat streaks. The batter will be thick and a little chunky from the oats, which is exactly what you want—don't overmix or you'll end up with tough cups.
- Add your personality:
- Fold in your chosen mix-ins gently—whether that's a scatter of blueberries, a handful of chocolate chips, or chopped walnuts. This is where you make them yours.
- Fill and bake:
- Divide the batter evenly among the muffin cups, filling each nearly to the top because they don't rise much. Bake for 23 to 27 minutes, watching until the tops turn golden and feel set when you tap them—they'll still feel slightly soft in the center, which is perfect.
- Cool and store:
- Let them sit in the pan for five minutes so they set up, then transfer to a wire rack to cool completely. This cooling time is crucial—rush it and they'll fall apart, give them the time and they'll hold together beautifully.
 Save
Save Last winter, I made a double batch and froze half in a paper bag in the back of my freezer. I forgot about them completely until late February when I was digging for something and found them. I thawed one and warmed it in the microwave, and honestly, it tasted fresher than some breakfast things I'd made just days before. That's when I realized these weren't just convenient—they were genuinely good food that my family actually wanted to eat.
Why These Work for Real Life
The beauty of baked oatmeal cups is that they sit somewhere between a muffin and a breakfast cereal, which means they work for almost any situation. You can eat them cold straight from the container if you're in a hurry, or microwave them for thirty seconds to bring back that warm, comforting breakfast feeling. I've packed them for hikes, thrown them in lunchboxes, left them on the counter for my teenager to grab, and even brought them to book club because they're substantial enough to count as real food instead of just a snack.
Mix-In Ideas and Combinations
The first batch I made was predictable—blueberries and walnuts, the safe choice. But once I realized how flexible these actually are, I started experimenting. Banana and peanut butter feels indulgent. Cranberry and white chocolate is oddly sophisticated for something you eat at six in the morning. Peach and almond reminds me of summer even in January. My current favorite is apple chunks with a little cardamom stirred into the dry ingredients, which sounds fancy but takes literally five more seconds. The mix-ins are where you stop following a recipe and start creating something that's exactly what you want to eat.
Storage and Reheating
These live happily in an airtight container in the fridge for five days, which is enough time to get through a solid week of mornings if you make a double batch. You can also freeze them for up to two months, and honestly, frozen-then-thawed tastes practically the same as fresh. A quick thirty seconds in the microwave brings back the warmth and slightly softens the texture, or you can eat them cold if you're in that kind of hurry. I learned the hard way that letting them warm to room temperature first before microwaving prevents cold spots, though this is only a problem if you're standing right there waiting—most mornings I just press start and get my coffee while they heat up.
- Thaw frozen cups on the counter overnight if you want them soft, or microwave them frozen for about a minute.
- They taste best when warmed, but cold works in a pinch, especially if you need them grab-and-go.
- If you find them getting dry in storage, a light cover with plastic wrap helps more than a sealed container somehow.
 Save
Save These oatmeal cups have somehow become more than breakfast at my house. They're Sunday afternoon ritual, they're the thing I bring when someone's had a rough week, and they're the reason my kids actually eat something decent before school instead of the chaos of no plan. That morning I made them because I overslept turned into something that actually changed how my mornings feel.
Recipe FAQ Section
- → How do I make these oatmeal cups gluten-free?
Use certified gluten-free rolled oats to ensure the oatmeal cups are safe for gluten-sensitive diets.
- → Can I substitute eggs for a vegan version?
Yes, replace each egg with 2 tablespoons of ground flaxseed mixed with 5 tablespoons of water, allowing it to thicken before mixing.
- → What mix-ins work best for flavor and texture?
Fresh or frozen berries, mini chocolate chips, chopped nuts, and dried fruits like cranberries create delicious variations.
- → How should I store the baked oatmeal cups?
Store them in an airtight container in the refrigerator for up to 5 days, or freeze for up to 2 months.
- → Can I prepare these oatmeal cups in advance?
Absolutely, they are ideal for meal prepping and can be baked then refrigerated or frozen for quick breakfasts later.