 Save
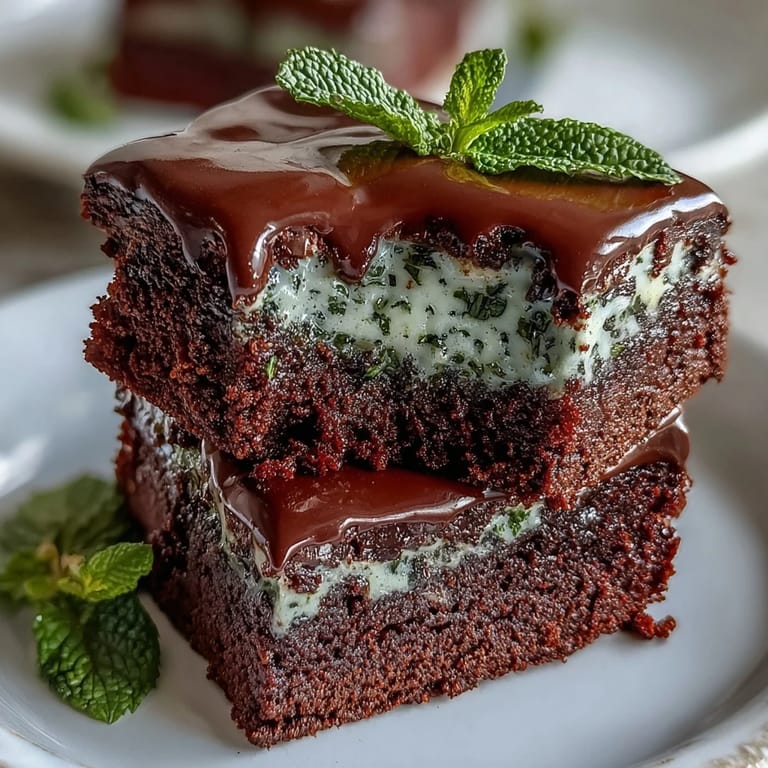
Save My kitchen smelled like a chocolate factory mixed with a candy shop the afternoon I first tested these mint chocolate chip brownie bites, and I knew immediately they'd become my go-to St. Patrick's Day contribution. There's something about the bright peppermint cutting through rich fudgy chocolate that feels both unexpected and utterly right, especially when you bite into one and that little hit of coolness surprises you. My neighbor wandered over drawn by the aroma, grabbed one still warm from the rack, and came back the next day asking for the recipe—which honestly tells you everything you need to know about how good these are.
I made a double batch for a St. Patrick's Day party last year and watched people reach past all the traditional green treats to grab these little bites instead. Someone's kid asked if they were magic because of how the mint came through at the end, and honestly, that moment made the entire baking session worthwhile—there's something special about making something that surprises people in the best way.
Ingredients
- All-purpose flour: Three-quarters cup gives you structure without making these dense or cakey, which is exactly the balance you want for fudgy brownie bites.
- Unsweetened cocoa powder: Half a cup of quality cocoa is non-negotiable—this is where your chocolate depth comes from, so don't skimp or settle for the bitter stuff that's been sitting in your cabinet.
- Baking powder: Just half a teaspoon helps them rise slightly without puffing up into muffins.
- Salt: A quarter teaspoon makes everything taste more like chocolate, sounds strange but trust it.
- Unsalted butter: Melt it and let it cool just a touch before using so it doesn't cook your eggs when they meet.
- Granulated sugar: One cup creates that fudgy, slightly crispy top while keeping the inside tender.
- Large eggs: Bring them to room temperature so they incorporate smoothly and your batter stays silky.
- Pure vanilla extract: Half a teaspoon balances the mint without competing with it.
- Peppermint extract: This is your secret weapon at half a teaspoon, but you can nudge it higher if you're bold—just watch you don't make them taste like toothpaste.
- Green food coloring: Two or three drops are optional but they make these festively green and people love that visual surprise.
- Mini chocolate chips: Half a cup plus extra for topping gives you chocolate in every bite, and the mini size distributes better than larger chips.
- Chopped Andes mints: A quarter cup optional but recommended because they add pockets of extra minty coolness throughout.
Tired of Takeout? 🥡
Get 10 meals you can make faster than delivery arrives. Seriously.
One email. No spam. Unsubscribe anytime.
Instructions
- Heat your oven and prepare:
- Preheat to 350°F while you get your mini muffin tin ready with either a light greasing or pop in some liners—this matters because you want these to come out cleanly without sticking. If you're using liners, grease them lightly anyway because brownie batter can cling to paper if you're not careful.
- Combine your dry ingredients:
- Whisk together the flour, cocoa powder, baking powder, and salt in a medium bowl until you don't see any cocoa streaks—this distributes the leavening evenly so you get consistent texture throughout. I like to sift mine because cocoa powder can clump, and clumps make dense spots in the final bite.
- Build your wet base:
- In a large bowl, whisk your slightly cooled melted butter with sugar until they look combined and shiny, then crack in your eggs and both extracts. If you're using food coloring, add it now and keep whisking until the color is smooth and even—this takes maybe a minute more but makes all the difference visually.
- Marry wet and dry:
- Gently fold the dry mixture into the wet mixture using a spatula, folding until just combined because overmixing turns these tough instead of tender. A few flour streaks are okay—that's better than overdoing it.
- Add your mix-ins:
- Stir in the mini chocolate chips and chopped Andes mints if using, distributing them evenly so no bite is mint-heavy and another is mint-light. The chocolate chips sink slightly during baking so scattered ones on top stay visible and pretty.
- Fill and top:
- Spoon batter into your prepared tin, filling each cup about three-quarters full because these rise a little and you don't want overflow. Top with extra chocolate chips if desired—they look beautiful and give you little chocolate crowns on each bite.
- Bake until just set:
- Bake for 13 to 15 minutes, checking around the 13-minute mark because oven temperatures vary and you want that toothpick to come out with a few moist crumbs clinging to it, not clean. Clean means overbaked, and overbaked means they lose that fudgy texture that makes them special.
- Cool and release:
- Let them sit in the tin for 5 minutes to set up slightly, then transfer to a wire rack to cool completely. Trying to move them earlier means they might crumble, but 5 minutes is the perfect sweet spot.
 Save
Save There was a moment last spring when I brought these to an office potluck and someone said, "These taste like Christmas and spring had a baby," and I think that's exactly what makes them work so well for St. Patrick's Day or really any celebration where you want something festive but unexpected. These little bites have a way of making people slow down and actually taste what they're eating instead of just grabbing whatever's easiest.
The Mint and Chocolate Balance
Getting the mint-to-chocolate ratio right took me a few attempts, and I learned the hard way that peppermint extract is sneaky potent—you think it's not doing much until you bite in and it floods your mouth. The secret is that the peppermint should come through as a cool whisper at the end of each bite, not overpower the chocolate that's supposed to be the star. I started with less extract than the recipe calls for and built up gradually, tasting the raw batter each time, until I found that magic point where the mint enhances rather than dominates.
Why Mini Muffin Tins Matter
These bites exist specifically because regular-sized brownies don't have the same appeal at parties—people grab one, finish it in two bites, and come back for another, which is honestly the best compliment a dessert can get. The smaller size also means they bake more evenly and consistently, and you get more pieces from one batch so they feel abundant even though you're using less batter per piece. I've tried making these in regular muffin tins and they came out more like dense little cakes, which isn't bad but misses the magic of these compact, fudgy bites.
Storage and Make-Ahead Magic
These keep beautifully in an airtight container for up to five days, which means you can make them a day or two before your St. Patrick's Day celebration and have one less thing to worry about. I actually think they taste better the next day when the flavors have had time to meld and mellow slightly, so early preparation is a feature, not a bug here.
- Store them in a single layer first if possible, then you can stack them once they're fully settled and won't squish together.
- If they're going to sit for more than a day, keep them in the coldest part of your fridge to maintain that fudgy texture.
- Let them come back to room temperature for about 10 minutes before eating if you've refrigerated them because cold dulls the mint flavor slightly.
 Save
Save These brownie bites have become my green dessert of choice because they taste special without requiring you to do anything weird or overly complicated in the kitchen. Make them once and they'll probably become a tradition you return to every year.
Recipe FAQ Section
- → What ingredients give the brownies their mint flavor?
Mint flavor comes primarily from peppermint extract and optional chopped Andes mints or mint chocolate pieces.
- → Can I make these brownies without food coloring?
Yes, the green food coloring is optional and only adds a festive look without affecting flavor.
- → How do I know when the brownie bites are done baking?
Insert a toothpick in the center; it should come out with a few moist crumbs but no wet batter.
- → What equipment is needed to prepare these bites?
A mini muffin tin, mixing bowls, whisk, measuring tools, and a wire rack for cooling are recommended.
- → How should I store the brownie bites?
Keep them in an airtight container at room temperature for up to five days to maintain freshness.