 Save
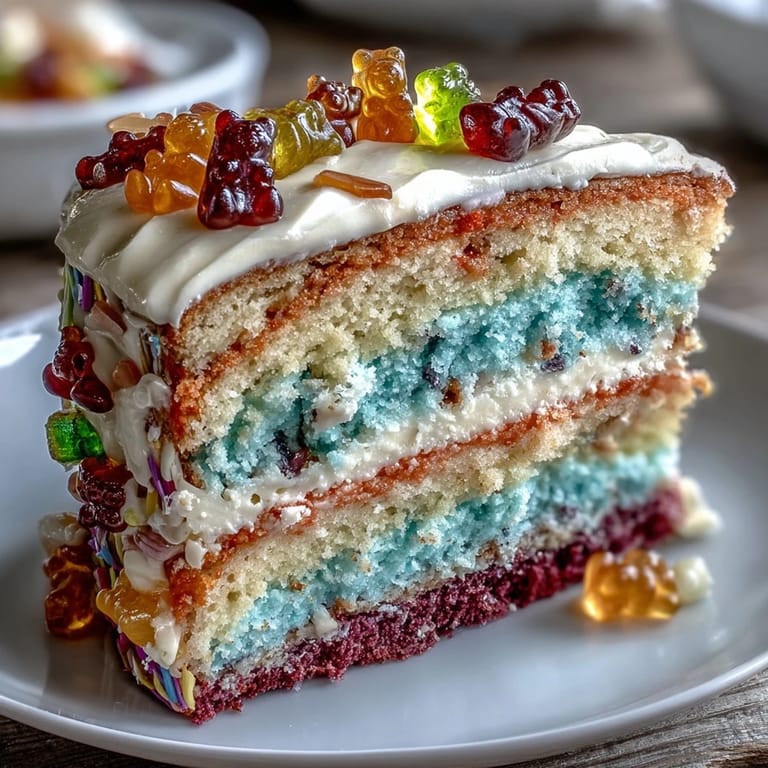
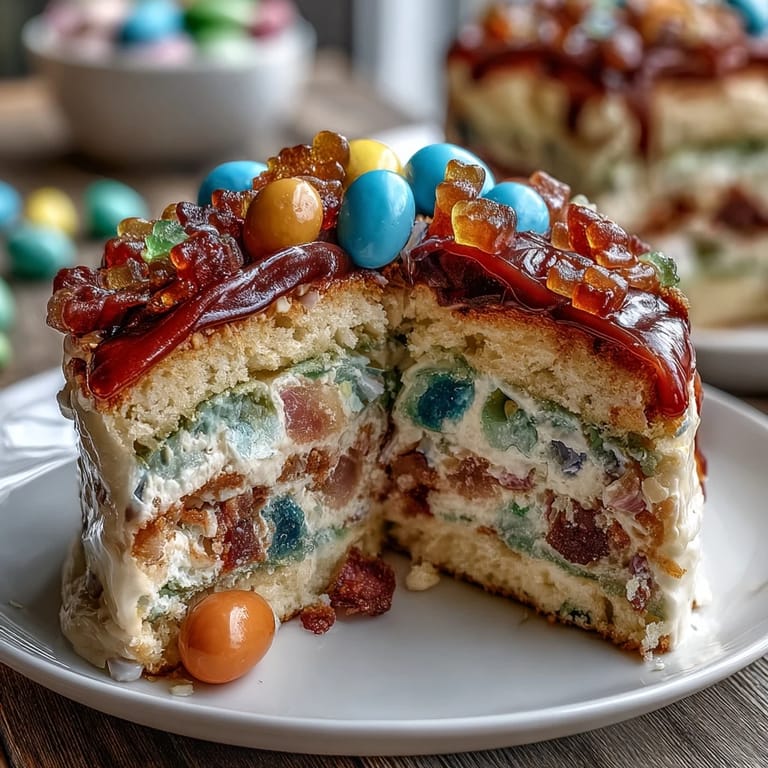
Save My neighbor Maria invited us over for Cinco de Mayo, and I wanted to bring something that would make her kids' eyes light up. That's when the piñata cake idea hit me—a cake that literally holds a surprise inside, just like the real thing. I spent an afternoon mixing rainbow batters, carefully stacking layers with candy tucked inside, and honestly, watching that first slice reveal the colorful surprise felt like magic happening in my own kitchen.
When I finally sliced into that first cake at Maria's party, the whole room went quiet for a second, then erupted. Kids were pointing, adults were laughing, and someone immediately asked for the recipe while their slice was still on the plate. That's when I knew this wasn't just cake—it was an experience wrapped in frosting.
Ingredients
- All-purpose flour (3 cups): The foundation of each tender layer; whisk it with the leavening agents so the cake rises evenly across all six colors.
- Baking powder and baking soda (2½ tsp and ½ tsp): These work together to lift each colored portion without creating a dense, heavy cake.
- Salt (½ tsp): A small pinch that makes the vanilla and butter flavors pop without tasting salty.
- Unsalted butter (1 cup softened): Cold butter won't cream properly, so leave it on the counter for about an hour before you start.
- Granulated sugar (2 cups): Beating this with butter for three full minutes creates tiny air pockets that make the cake light and fluffy.
- Eggs (4 large, room temperature): Room temperature eggs incorporate more smoothly into the batter and create a more tender crumb.
- Vanilla extract (2 tsp): The flavor backbone that ties all six colors together so they taste like one cohesive cake.
- Whole milk (1¼ cups, room temperature): Warm milk prevents temperature shock that could cause the batter to seize.
- Gel food coloring (red, orange, yellow, green, blue, purple): Gel colors are more concentrated than liquid, so they won't thin your batter or muddy the hues.
- Assorted small candies (1½ cups): Mini M&Ms, gummy bears, and rainbow sprinkles create that jaw-dropping moment when someone discovers the surprise.
- Unsalted butter for frosting (1½ cups softened): This needs to be truly soft and spreadable to achieve that smooth, fluffy finish.
- Powdered sugar (5 cups sifted): Sifting removes lumps and helps you avoid an overly thick, grainy frosting.
- Milk and vanilla for frosting (¼ cup and 2 tsp): These soften the frosting slightly so it spreads without crumbling the delicate cake layers.
Tired of Takeout? 🥡
Get 10 meals you can make faster than delivery arrives. Seriously.
One email. No spam. Unsubscribe anytime.
Instructions
- Set up your workspace:
- Preheat your oven to 350°F and grease three 8-inch round pans with butter or cooking spray, then line the bottoms with parchment paper so nothing sticks. This step takes five minutes but saves you from sticking disasters later.
- Mix the dry ingredients:
- Whisk flour, baking powder, baking soda, and salt in a medium bowl until they're completely combined and no lumps hide in the corners. Set this mixture aside and take a breath—you're building the foundation.
- Cream butter and sugar:
- Beat softened butter with granulated sugar for a full three minutes until the mixture looks pale, fluffy, and almost mousse-like. You'll know it's ready when it falls from the beaters in soft ribbons.
- Add eggs and vanilla:
- Add eggs one at a time, beating well after each addition so the batter stays smooth and emulsified. Mix in vanilla and the batter should look creamy and unified.
- Alternate wet and dry:
- Add one-third of the flour mixture, then half the milk, then another third of flour, then the remaining milk, and finally the last of the flour, beating gently after each addition. This three-part rhythm prevents overmixing and keeps the cake tender.
- Divide and color:
- Pour the plain batter into six bowls, then add a different gel food coloring to each one, stirring until the color is even and vibrant. Don't use liquid food coloring—it thins the batter too much and muddies your beautiful rainbow.
- Bake the layers:
- Pour each colored batter into its own prepared pan, smooth the tops, and slide into the oven for 15 to 18 minutes until a toothpick comes out clean. If you only have three pans, bake in batches and they'll still bake at the same speed.
- Cool with patience:
- Let the layers rest in their pans for ten minutes so they firm up enough to turn out onto wire racks without falling apart. Complete cooling takes about an hour, and you can't skip this step or your layers will crumble when you stack them.
- Create the piñata cavities:
- Once all six layers are cool, take a 3-inch round cutter and carefully cut circles from the center of four layers, leaving the top and bottom layers whole. These hollow layers will hold your candy surprise, so keep the cut circles (you can snack on them).
- Make the frosting:
- Beat softened butter until it's light and creamy, then gradually add sifted powdered sugar while mixing on low speed so you don't create a powdered sugar cloud in your kitchen. Add milk, vanilla, and salt, then beat until the frosting is smooth, fluffy, and spreadable.
- Stack and fill:
- Place your purple (bottom) whole layer on a serving plate, spread a thin frosting layer, then stack a cut-out layer on top and frost lightly. Repeat with the remaining cut-out layers, building height as you go.
- Pour the surprise:
- Carefully pour your assorted candies into the central cavity you've created with the stacked cut-out layers, filling it generously so the payoff is truly surprising. Watch them tumble in and imagine the moment someone discovers them.
- Top it off:
- Place the final whole layer (your top) over the candy-filled cavity, creating a sealed piñata cake ready to reveal its secret. Press down gently so it sits stable.
- Frost the masterpiece:
- Spread frosting over the outside and top of the cake generously, smoothing it with an offset spatula for a polished look or leaving it rustic and textured. Add extra decorations like sprinkles, edible glitter, or colorful frosting drizzles to amplify the festive vibe.
- Chill before serving:
- Refrigerate the finished cake for at least 30 minutes so the layers set and frosting firms up, which makes slicing cleaner and the reveal more dramatic. The cold cake also holds its shape better when you're cutting through all those layers.
 Save
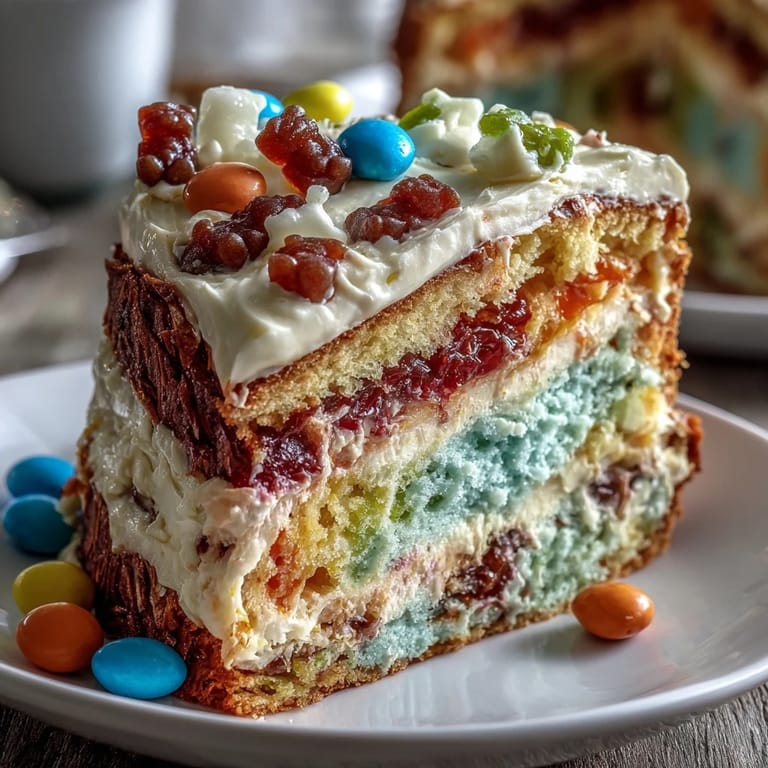
Save At Maria's house, one of the kids asked if the cake had real candy inside or if it was just frosting pretending to be fancy. When we sliced and revealed those gummy bears and M&Ms cascading out, he couldn't stop grinning. That moment reminded me that the best recipes aren't just about taste—they're about creating memories that stick around longer than the cake itself.
Why Gel Food Coloring Changes Everything
I learned this the hard way the first time I tried liquid food coloring in a batch of six-layer rainbow cake. The batter got so thin and watery that my beautiful yellow layer came out flat and dense, refusing to rise like its neighbors. Switching to gel coloring was the turning point—the vibrant colors stay bold, the batter stays thick and fluffy, and all six layers rise at exactly the same rate, creating those perfectly even slices everyone dreams about.
The Secret to Stacking Without Crumbles
Those ten minutes you let the layers cool in the pans matter more than you'd think. I once tried turning a layer out too quickly, and it broke into three pieces before it even hit the cooling rack. Now I set a timer, let the layers firm up completely, and transfer them gently to racks where they can finish cooling without stress. Your patience here directly translates to a cake that holds together during assembly and impresses everyone at the table.
Making the Piñata Moment Absolutely Unforgettable
The real magic happens when you cut that first slice and the candies tumble out onto the plate—so think carefully about which candies create the best moment. I've found that a mix of colors and textures works best, and avoiding anything sticky means you won't have candy glued to the inside of your cake layers. The surprise should feel generous and generous and delightful, not like someone threw a handful of M&Ms in and called it a day.
- Mix bright colors (mini M&Ms, rainbow sprinkles, gummy bears) so the candy revelation looks as festive as the cake itself.
- Check your candy packaging for allergens since the candies might contain nuts, soy, or gluten even if the cake doesn't.
- Fill the cavity generously so when someone cuts into the cake, they get a real candy payoff that justifies all your layering work.
 Save
Save This cake earned a permanent spot in my Cinco de Mayo rotation because it does something most desserts can't—it makes people happy before they even taste it. Bake this for someone you care about and watch their face when they discover what you've hidden inside.
Recipe FAQ Section
- → How do I achieve the colorful layers?
Divide the batter evenly and tint each portion with gel food coloring to create vibrant hues before baking.
- → What kind of candies work best for the filling?
Use small, non-sticky candies like mini chocolate pieces, sprinkles, or gummies for easy cutting and a fun surprise.
- → Can I prepare the cake in advance?
Yes, chilling the cake for at least 30 minutes before slicing helps maintain shape and neat slices.
- → How do I create the hollow center in the layers?
Use a round cutter to remove centers from four of the six layers, leaving top and bottom layers whole for support.
- → Are there alternatives for a gluten-free version?
Substitute all-purpose flour with a 1:1 gluten-free blend to adapt the batter accordingly.